Subject Isolation
Shallow Depth of Field Mini-Story
“As a cinematographer, it’s my job to help direct the audience’s eye to the most important part of the frame.” — Greig Fraser, Cinematographer Dune: Part One
This is not a classroom lesson but a short homework task I created for a February break week. Its real strength is accessibility. Students need nothing more than a smartphone, which makes it perfect for schools working with limited budgets or very little equipment. Even an older phone can usually do the job. The exercise gives students a simple but effective way to begin exploring depth of field and subject isolation through practice, introducing a cinematic idea that I normally save for the beginning of the second year..
Cycle Overview
This assignment turns a technical idea into a storytelling task. Students create individually a 30 to 60 second micro-story in which shallow depth of field is used to control viewer attention. The blur is not there to make the image look “cinematic.” It must help guide meaning. Students must build a short sequence or continuous take that includes at least four distinct moments of subject isolation, one rack focus, and one reveal. They also complete a short written reflection explaining the techniques they used and the effect they were trying to create.
This is a compact but very useful cinematography exercise because it pushes students to think about focus as visual storytelling. It also fits well with the IB film course’s emphasis on inquiry, action, and reflection, and with the expectation that students explore production roles through practical experiments and then evaluate what they learned from them. In the DP Film Guide, this structure sits at the heart of both the taught course and the Film Portfolio process. IB Film Guide, pp. 21–25 and 57–60.
Core Components
This assignment focuses on six connected ideas.
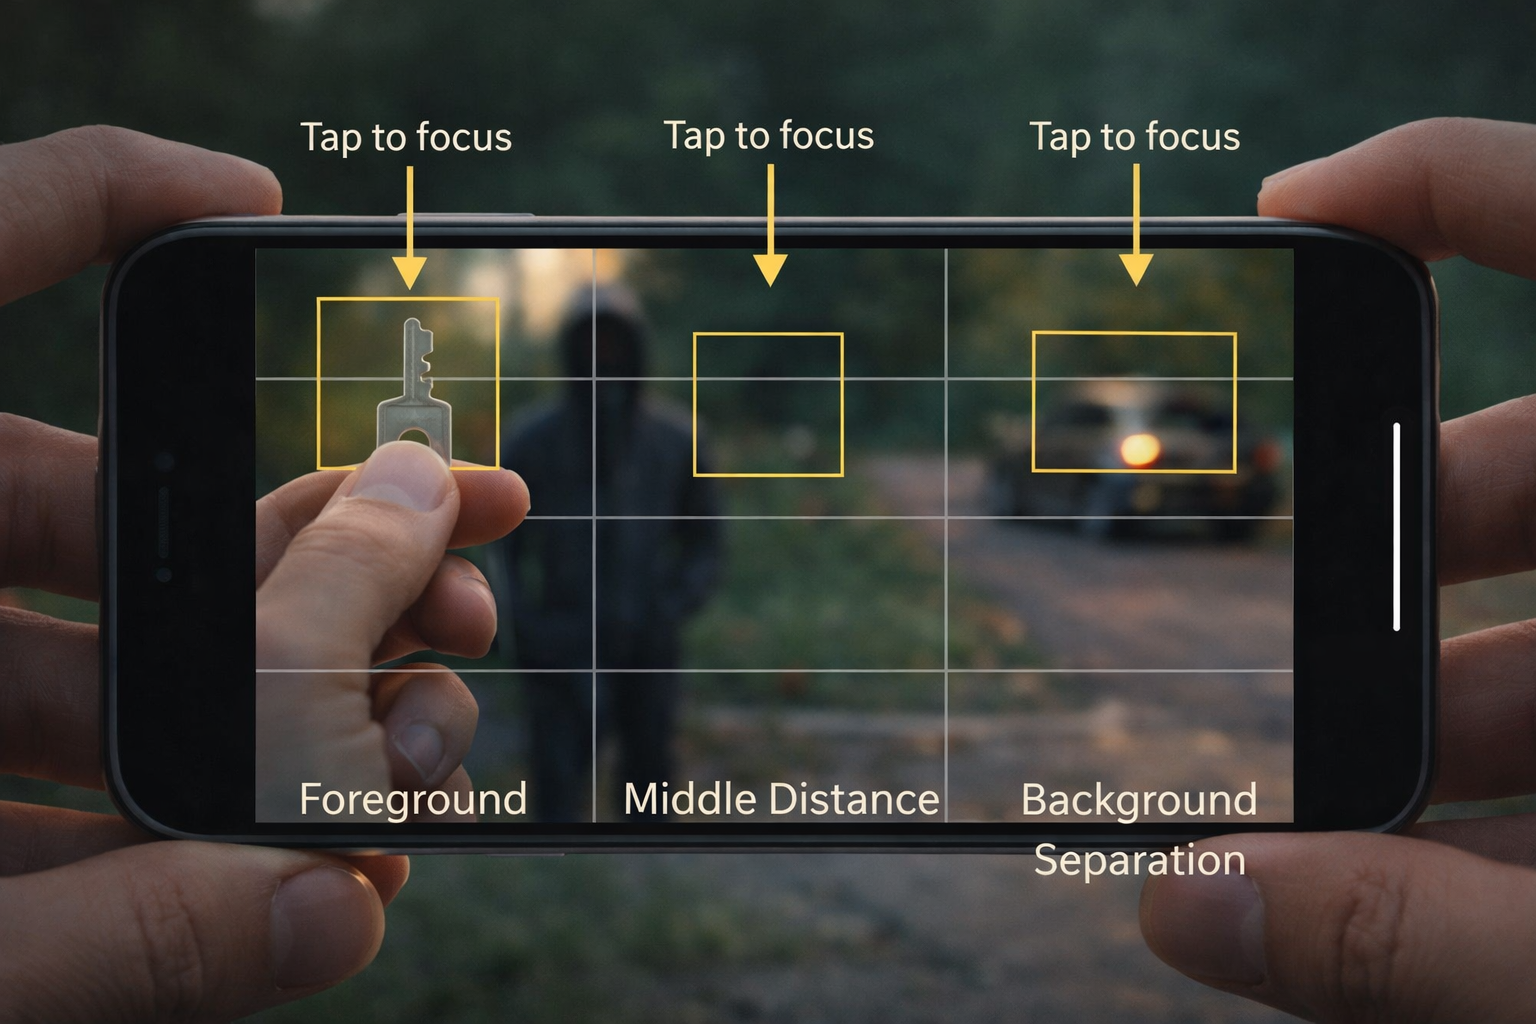
1. Subject isolation
Students learn that the audience’s eye does not wander by accident. A filmmaker can shape attention by deciding what is in focus and what is blurred. The task’s central goal is to make that choice visible and intentional within a frame.
2. Shallow depth of field as meaning
Students are not simply asked to produce blur. They are asked to use shallow depth of field to emphasise a subject, delay information, or shift narrative meaning. This keeps the lesson focused on cinematic intention rather than decoration.
3. Rack focus
The rack focus is a required moment in which attention shifts from one subject or plane to another. In this lesson, the rack focus should not feel random. It must be readable and timed with purpose.
4. Reveal structure
Students must also include a reveal. This means information is withheld at first and then made clear through focus, reframing, or movement. That requirement is what turns the exercise from a camera drill into a micro-story.
5. Smartphone cinematography
The task is designed for phones, which makes it practical and accessible. Students can create shallow depth of field by combining at least two strategies, such as moving close to the subject, keeping the background far away, using Cinematic or Portrait video on supported devices, using similar background-blur video modes on supported Android phones, and locking focus manually. On supported iPhones, Apple notes that Cinematic mode can keep a subject sharp while blurring foreground and background, while allowing manual focus changes and focus lock. Similar options are also available on some Android devices, although feature names and availability vary by brand and model.
6. Reflection
The reflection matters because it helps students build one of the most important habits in IB Film: learning to justify and evaluate their artistic decisions. They are not simply asked to say what they did. They must explain how they created shallow depth of field and why that choice mattered in the story. Even if students do not yet fully understand why this kind of reflection is so important, the habit needs to start early. The Film Portfolio expects students to define filmmaker intentions, reflect on their practical experiments, and evaluate how far their work fulfilled those intentions. This short written piece is therefore less about length and more about training students to think like reflective filmmakers from the beginning.
Assessment Focus
This assessment is an individual cinematography exercise built around a very clear technical and narrative brief. Students submit:
one 30–60 second video
one 120–200 word reflection
Students may choose one of two formats. They can either create an edited multi-shot sequence with at least six shots, or a single continuous take with at least six distinct beats. In both formats, the work must include four clearly visible shallow depth of field moments, one rack focus, and one reveal.
The rubric is very focused and easy for students to understand. High-level work meets the brief, shows consistent and visible subject isolation, uses a rack focus that clearly shifts attention, presents a reveal that actually clarifies the story, and includes a reflection that explains both technique and intention.
This kind of tight framing is useful because IB subject reports repeatedly show that students do better when production work is role-specific, intention-driven, and reflective, rather than vague, purely descriptive, or technically accidental. The 2024 and 2025 Film subject reports both stress the importance of clear filmmaker intentions, explicit teaching of roles, and reflection that goes beyond describing what happened.


Sample Lab
Above you can see 3 different samples that overall, are excellent, showing extremely creative use of the depth of field while telling a solid story with overall great composition. Below you can see their individual reflection ( inside the box) and right after my comments:
Sample 1:
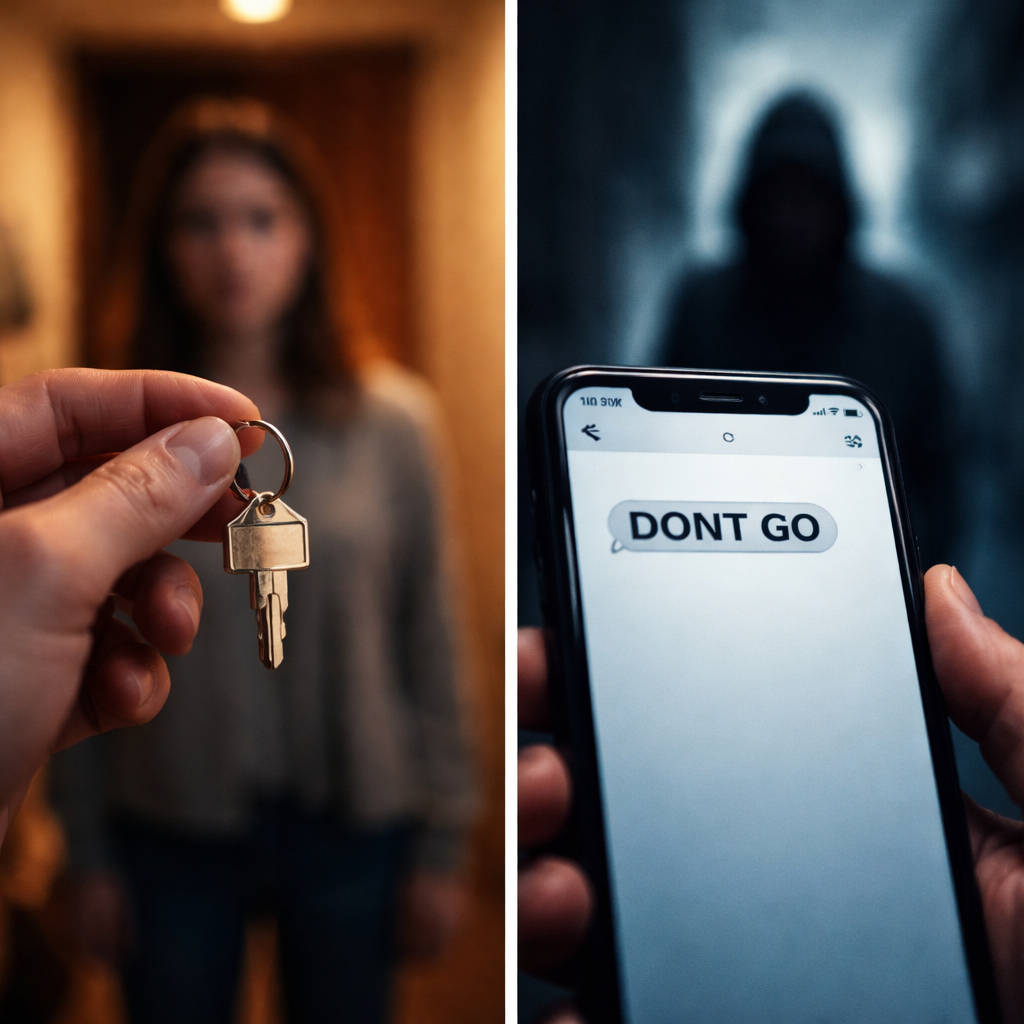
I got a shallow depth of field on my iphone by using cinematic mode, which automatically blurs the background if there is a clearly visible subject. I also locked the focus for some shots so it didn’t follow a moving subject and let it automatically follow the subject for others. The best use of depth of field is the opening shot because it clearly identifies one of the characters as the main character but then shifts to show another important character. Its goal was to make the shot feel more peaceful as the character walks (natural background without any specific trees in focus), but then transition to creepy once the second character is revealed stalking the first. Next time I would try to make cleaner lines between the areas in focus and the blurred areas. Sometimes the edges of people, like noses or hair, get blurred like the background. I would also try to fix some of the automatic focus shifts that happened with moving subjects. Usually it is a very helpful tool because I can keep the focus on a person rather than a space, but sometimes as they walked they would go in and out of focus.
My take on the reflection:
Sample’s 1 reflection is good. It is shorter and simpler than Sample 3, but it stays focused and answers the prompts effectively. She explains how she achieved shallow depth of field on her phone, points to the opening shot as the strongest storytelling moment, and clearly identifies the intended emotional shift from peaceful to creepy once the second character is revealed. That is a solid connection between film technique and audience effect. Her final paragraph is also useful because she reflects on the limitations of the phone tool itself, especially the messy edge blur and inconsistent automatic focus changes. This reflection is not as rich or layered as Sample 3, but it is definitely strong enough to publish as a student sample.
Sample 2:
1. What did you do to create a shallow depth of field on your phone (distance, lens, mode, focus lock, etc.)?
I used my iphone in cinematic mode that has a very strong blur effect already and I would use the lock feature to lock the focus on the subject. For the rack I had it locked on subject A and then pressed on my screen on subject B to focus into the new subject.
2. Which moment used shallow depth of field best for storytelling (describe the shot/beat and intended effect)?
I think the rack effect was the most effective. The main plot of the story is revealed only after the note is focused in but you can still see a reaction in the actor from the reflection of the phone. I was able to show a lot in just one focus of a single subject.
3. What would you change next time to improve focus control (more separation, cleaner rack focus timing, steadier movement, etc.)?
I would keep steadier movement for sure. One thing I noticed that I need to work on is to have cleaner cuts. My cuts often don’t seem to align. For example, I will have my hands on my face and the next cut is me pressing on the trackpad. This is only noticed when editing and is recurring. I should plan my shots clearer before exporting it.
My take on the reflection:
Sample 2 reflection is the most basic of the three. It is clear and easy to follow, and it does answer the three questions directly. He explains how he used Cinematic mode and focus lock, and he identifies the rack focus as the strongest moment. There is also a promising sentence when he says he was able to show a lot in one focus shift, because that points toward an awareness of visual economy. The problem is that he does not fully develop that idea. His reflection stays closer to description than analysis, and the final paragraph shifts more toward editing continuity and planning than toward focus control itself. That does not make it bad, but it does make it less sharp as a model for this specific assignment. It is a competent reflection, just not as strong as the other two.
Sample 3:
I have never intentionally used shallow depth of field before, so this assignment was a fun challenge. I used the cinematic feature on my iphone to select a subject by holding my finger down until the focus was locked. I then selected another area in the frame to shift focus. The best example of shallow depth of field for storytelling was a shot at the beginning where the focus transitions from a woman completing a puzzle while listening to music, to a man outside the window. The intended story is that a woman is so entranced in her activity that she completely tunes out her surroundings, symbolized by the blurred background. Then, a man who forgot his keys tries unsuccessfully to get her attention, revealed by the focus shifting to the background so the audience can see the real action. The window was used as a prop to separate the subjects and create physical depth, however the natural light did impact the overall color quality/ exposure of some of the shots, so I tried to color correct in post-production, though it isn’t perfect. In the future, I would try to use a tripod for steadier movement and choosing a space with more light control. I would also try to master the rack focus technique on a film camera rather than my iphone for a smoother focus transition and an overall better quality, amd I would choose subjects/ backgrounds with more distinctive color contrast to emphasize the change in focus.
My take on the reflection:
Sample 3 reflection is the best because it combines technique, story intention, and self-evaluation in a very clear way. She explains how she used Cinematic mode and focus lock, identifies a specific storytelling moment, and then clearly connects the focus shift to narrative meaning: the woman is absorbed in the puzzle, while the man outside the window becomes the real action only when focus changes. That is exactly the kind of reflection you want students to build toward. It shows that she is not only describing what she did, but also why the focus shift matters. She also includes practical reflection on exposure, color correction, steadiness, light control, and color contrast, which makes the piece feel honest and grounded. The writing has a few small slips, but overall this is a strong model.
Reflection and Growth
This lesson often changes the way students think about cinematography. At first, many assume shallow depth of field is just a fashionable look. By the end of the task, they usually understand that focus is really about control. What is sharp matters. What is blurred matters. When the focus changes, meaning changes with it.
The lesson is also valuable because it teaches students to keep a story small. A successful submission does not need a complicated plot. In fact, the best mini-stories are often built around one choice, one object, one face, or one hidden detail. That economy is useful later in IB Film, especially when students need to show clear creative decision-making rather than just ambition.
Finally, the short reflection matters more than it may first appear. The DP Film Guide recommends that students maintain a film journal and document learning through research, planning, practical work, and reflection. This task gives them a manageable way to practise exactly that habit. IB Film Guide, pp. 19–20.
Connections to IB Final Assessments
Textual analysis (SL and HL)
Although this is a production task, it also strengthens analytical vocabulary. Students begin to understand how focus, framing, composition, and reveal create meaning for a viewer. That matters for Textual Analysis, where students must explain the intended effects of film elements rather than simply identify them. Subject reports repeatedly note that stronger responses analyse the effect of a choice, not just the choice itself.
Film Portfolio (SL and HL)
This is the clearest link. The Film Portfolio requires students to work in clearly defined production roles, develop filmmaker intentions, create practical experiments and completed work, and reflect on what they learned through inquiry, action, and reflection. This mini-story does exactly that in a compact cinematography task. It is especially useful as preparatory evidence because the Guide allows exercises, experiments, and completed films, provided there is room for student ownership and creative exploration. IB Film Guide, pp. 57–60. Subject reports also stress that stronger portfolio work has clear intentions, role-specific evidence, and meaningful reflection.
Collaborative film project (HL only)
The strongest HL collaborative project work is role-specific and clearly justified. This homework is a valuable early step for students who may later choose cinematography, because it encourages them to push visual storytelling beyond simple proxemics and angles. Students begin to see that cinematography also involves focus, depth, and the deliberate control of audience attention. It also reminds them that strong visual choices do not always depend on sophisticated equipment, since this task can be completed with nothing more than a smartphone. In the Collaborative Film Project, however, students are expected to go much further: they should research their chosen role in depth and push the creative possibilities of that role with greater ambition and precision. In that sense, this task works well as a foundation for future cinematographers, offering an accessible but meaningful first step toward more advanced role-specific work.
Further Reading
American Cinematographer Magazine
A valuable resource for moving students beyond the idea of “pretty images” and toward a more professional understanding of how cinematography guides attention and creates meaning. The interview with Stephen Campbell is especially relevant to this task because it discusses how depth of field can be used to direct the audience’s eye.
StudioBinder, “The Rack Focus: How to Guide Viewers’ Eyes with a Shot List”
A clear and student-friendly video introduction to rack focus as a storytelling device. This is especially useful for beginners because it breaks down how a shift in focus can redirect attention and reveal new information within a shot, which connects directly to the aims of this homework.
ShotDeck
A searchable cinematic image library that allows students to study framing, lighting, color, lensing, and composition through stills from films. It is especially useful for students beginning to research visual style or gather references for their own practical work. ShotDeck describes itself as the world’s largest fully searchable cinematic image database, created as a professional tool for filmmakers from pitch to prep to post.
Gustavo Mercado, The Filmmaker’s Eye: Learning (and Breaking) the Rules of Cinematic Composition
This is probably the best addition if you want something practical, visual, and accessible for students or new filmmakers. It is especially useful because it focuses on composition and visual storytelling in a way that connects well to lessons on focus, framing, and directing attention within the frame. No Film School’s 2024 cinematography-book list highlights it as a practical guide filled with real-world examples.
Teacher's Notes
This homework works best in the middle of a cinematography unit, especially before students attempt more complex scene coverage but after they are already comfortable with basic composition, proxemics, and angles. It teaches one idea very clearly: focus is narrative control. That makes it much stronger than a generic “make a blurry background” exercise.
Keep the story prompt small. Students often do better with a hidden object, a delayed piece of information, or a simple emotional shift than with a large dramatic scenario. The reveal should be easy to understand. The real challenge here is cinematography, not plot complexity.
It is worth insisting on a single intention sentence before shooting. Something as simple as “I want to hide key information and reveal it through focus” gives the exercise a strong centre. This also echoes what IB examiners consistently reward in portfolio work: clear, role-specific intentions rather than vague goals.
Do not let students depend entirely on software blur. If their phones support Cinematic mode or similar tools, that is helpful, but the stronger learning comes from understanding distance, lens choice, and focus control, which I normally cover in greater depth at the beginning of Year 2. In other words, students should understand why the image looks the way it does.
A useful extension is to ask students to remake the same mini-story in deep focus and compare the effect. That creates a strong bridge to textual analysis because students can discuss how a single cinematographic choice changes the viewer’s experience.
For the written reflection, I tend not to be especially strict in terms of grading. My priority is to make sure students stay focused on the “why” of their choices, rather than only the “what” or the “how.” The task itself already pushes them in that direction by asking them to explain how they created shallow depth of field, identify the moment that used it best for storytelling, and reflect on what they would improve next time.
Finally, this is a good place to reinforce IB expectations around health and safety and ethical filmmaking. Students should not create risky shots on stairs, roads, balconies, or in crowded public spaces just to chase a “cinematic” image. Production work should remain safe, responsible, and age-appropriate.
Here you can find a PDF of my student handout and a PDF of my rubric.